How to Create a Visitor Pass using the WEB APP
This guide provides step-by-step instructions on how to effectively utilize the Access & Visitors feature within your association’s account on the ONR App. Using Doral Isles as an example, you’ll learn how to create visitor passes effortlessly with the following straightforward steps.
Step-by-Step Guide:
1. Log in to your account on a laptop or desktop computer at https://doralisles.onrapp.us/
2. Once logged in, find the concierge bell icon at the top center of the screen and click on it.![]()
3. In the left-hand menu, choose “ACCESS & VISITORS.”
4. Click “Create New Pass.”
5. You’ll be presented with three pass types. Here’s a quick overview of each:
- VISITOR PASS: This pass is meant for specific users whose names you need to input. It can be used for day passes, permanent access, or restricted access (e.g., housekeeping, cleaning, or pool maintenance) within specified date ranges.
- EVENT PASS: Ideal for events such as birthday parties, this pass eliminates the need for individual registrations.
- SERVICE OR DELIVERY: Use this option when you’re aware of the company or entity name but not the individual. Register the service or delivery along with the date and time frame.
Select the ‘Pass Type’ (Choose the appropriate pass type based on your requirements)
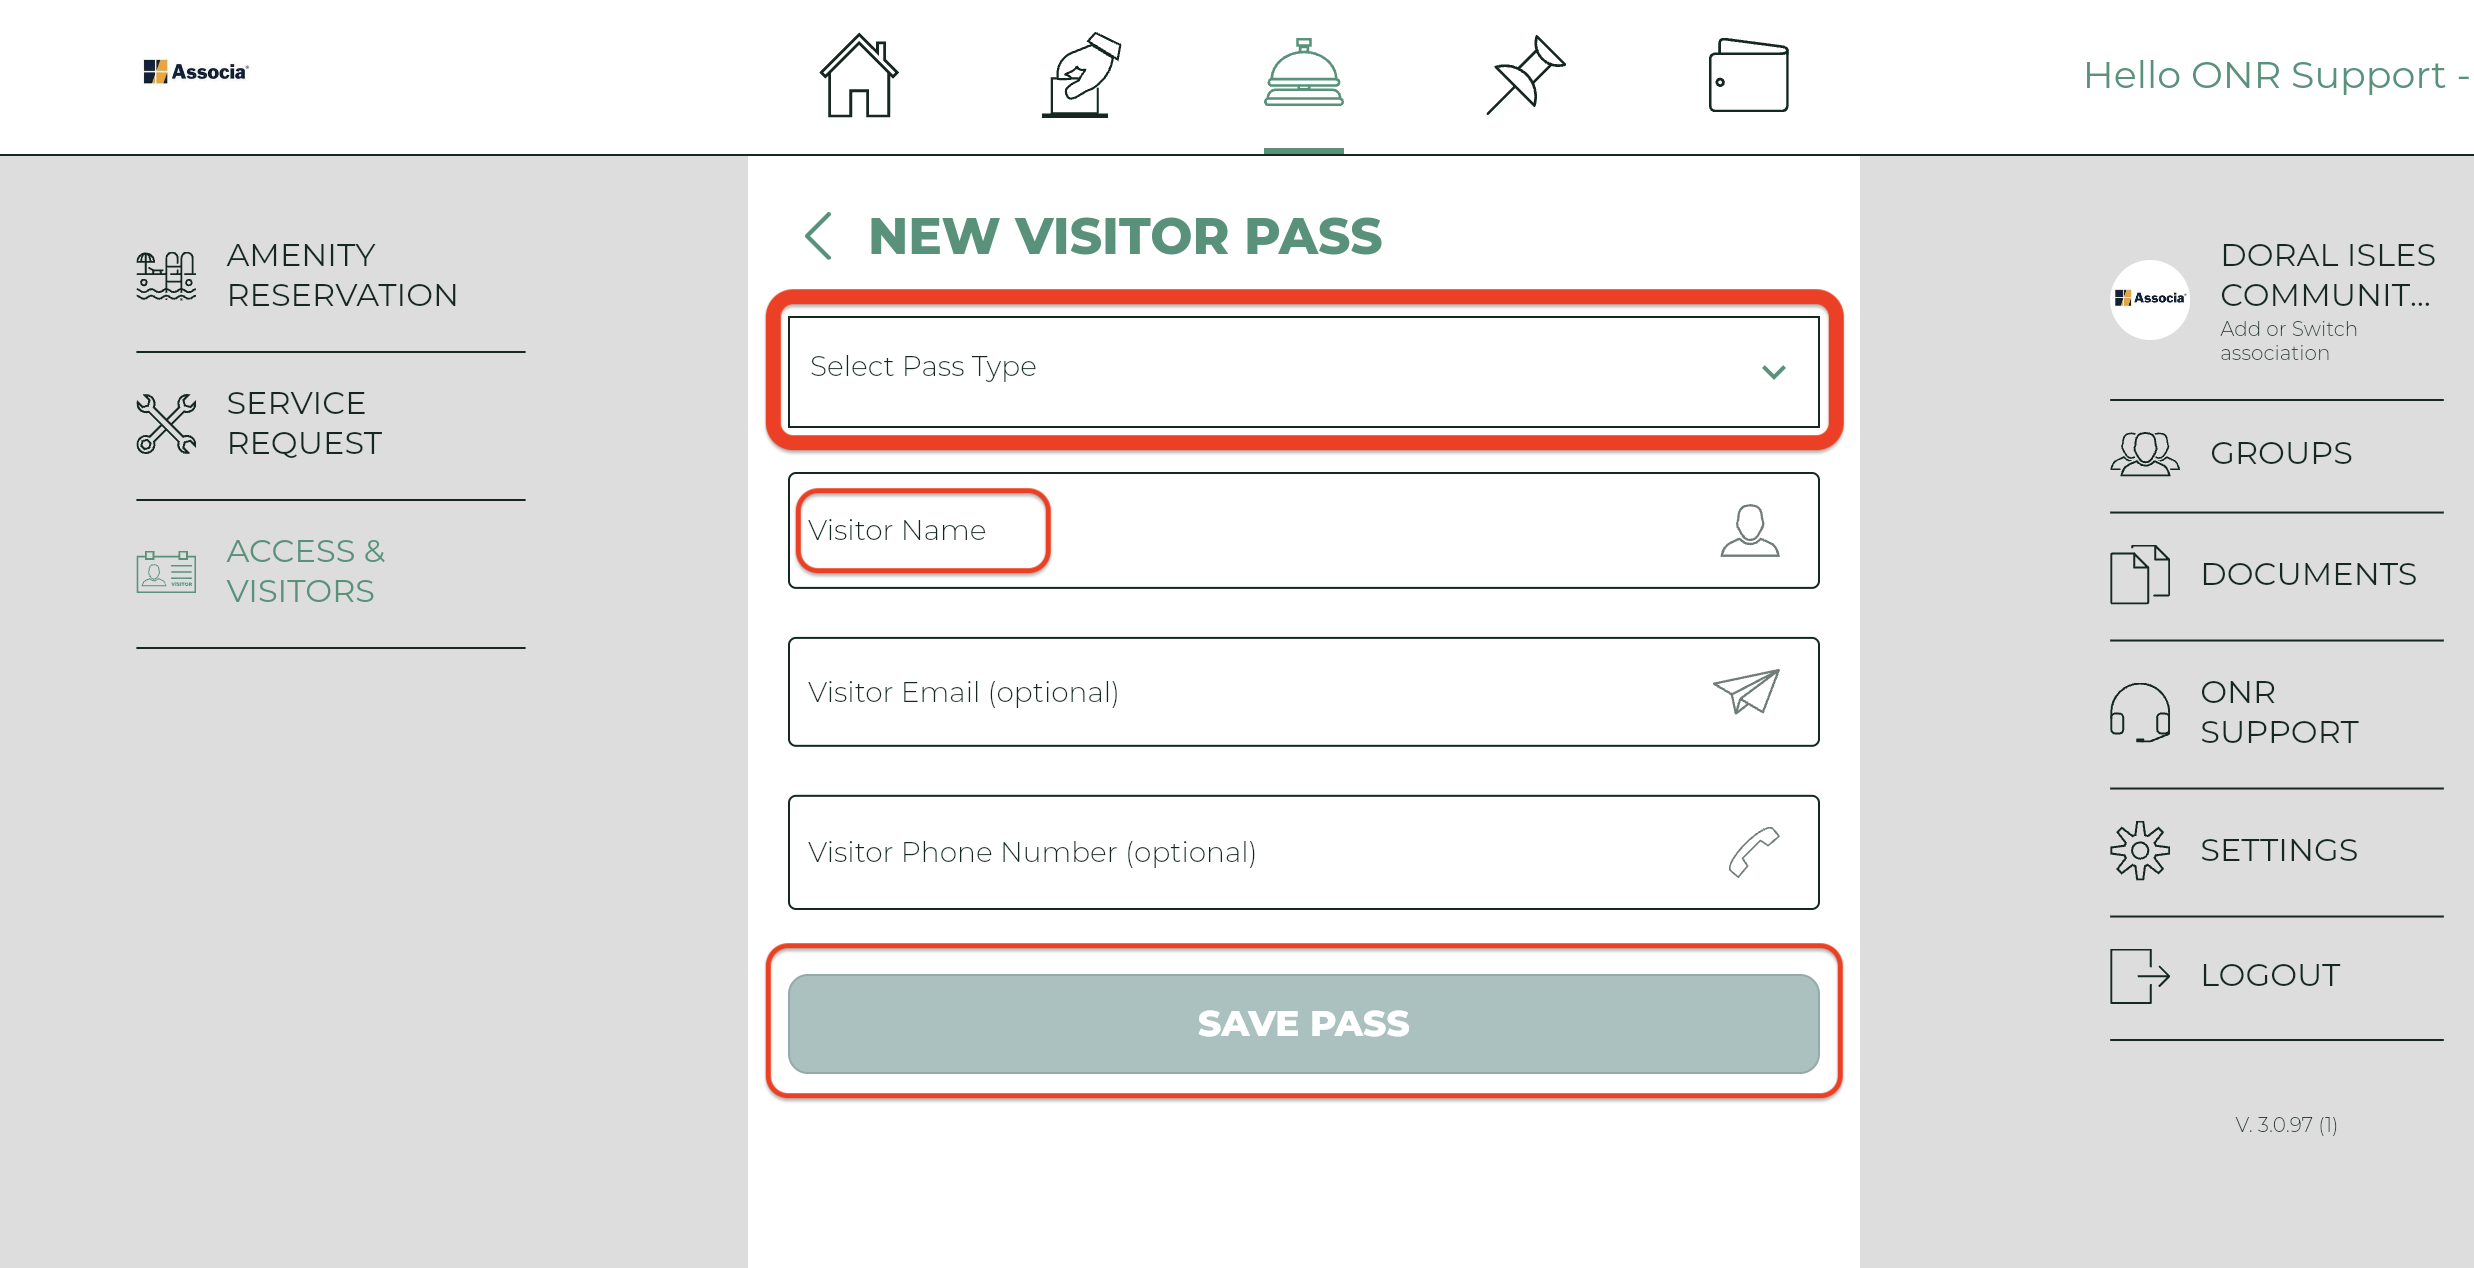
6. In this example, we’ll select “Visitor Pass.” You’ll see the “Select Pass Type” field with three options:
- Day Pass
- Restricted Access Pass
- Permanent Access Pass

For this case, we’re choosing “Permanent Access Pass.” Provide the required name, and you can also add their email address and/or cell phone number for direct delivery of the visitor pass.
Once the details are entered, tap “SAVE PASS” to generate the pass.
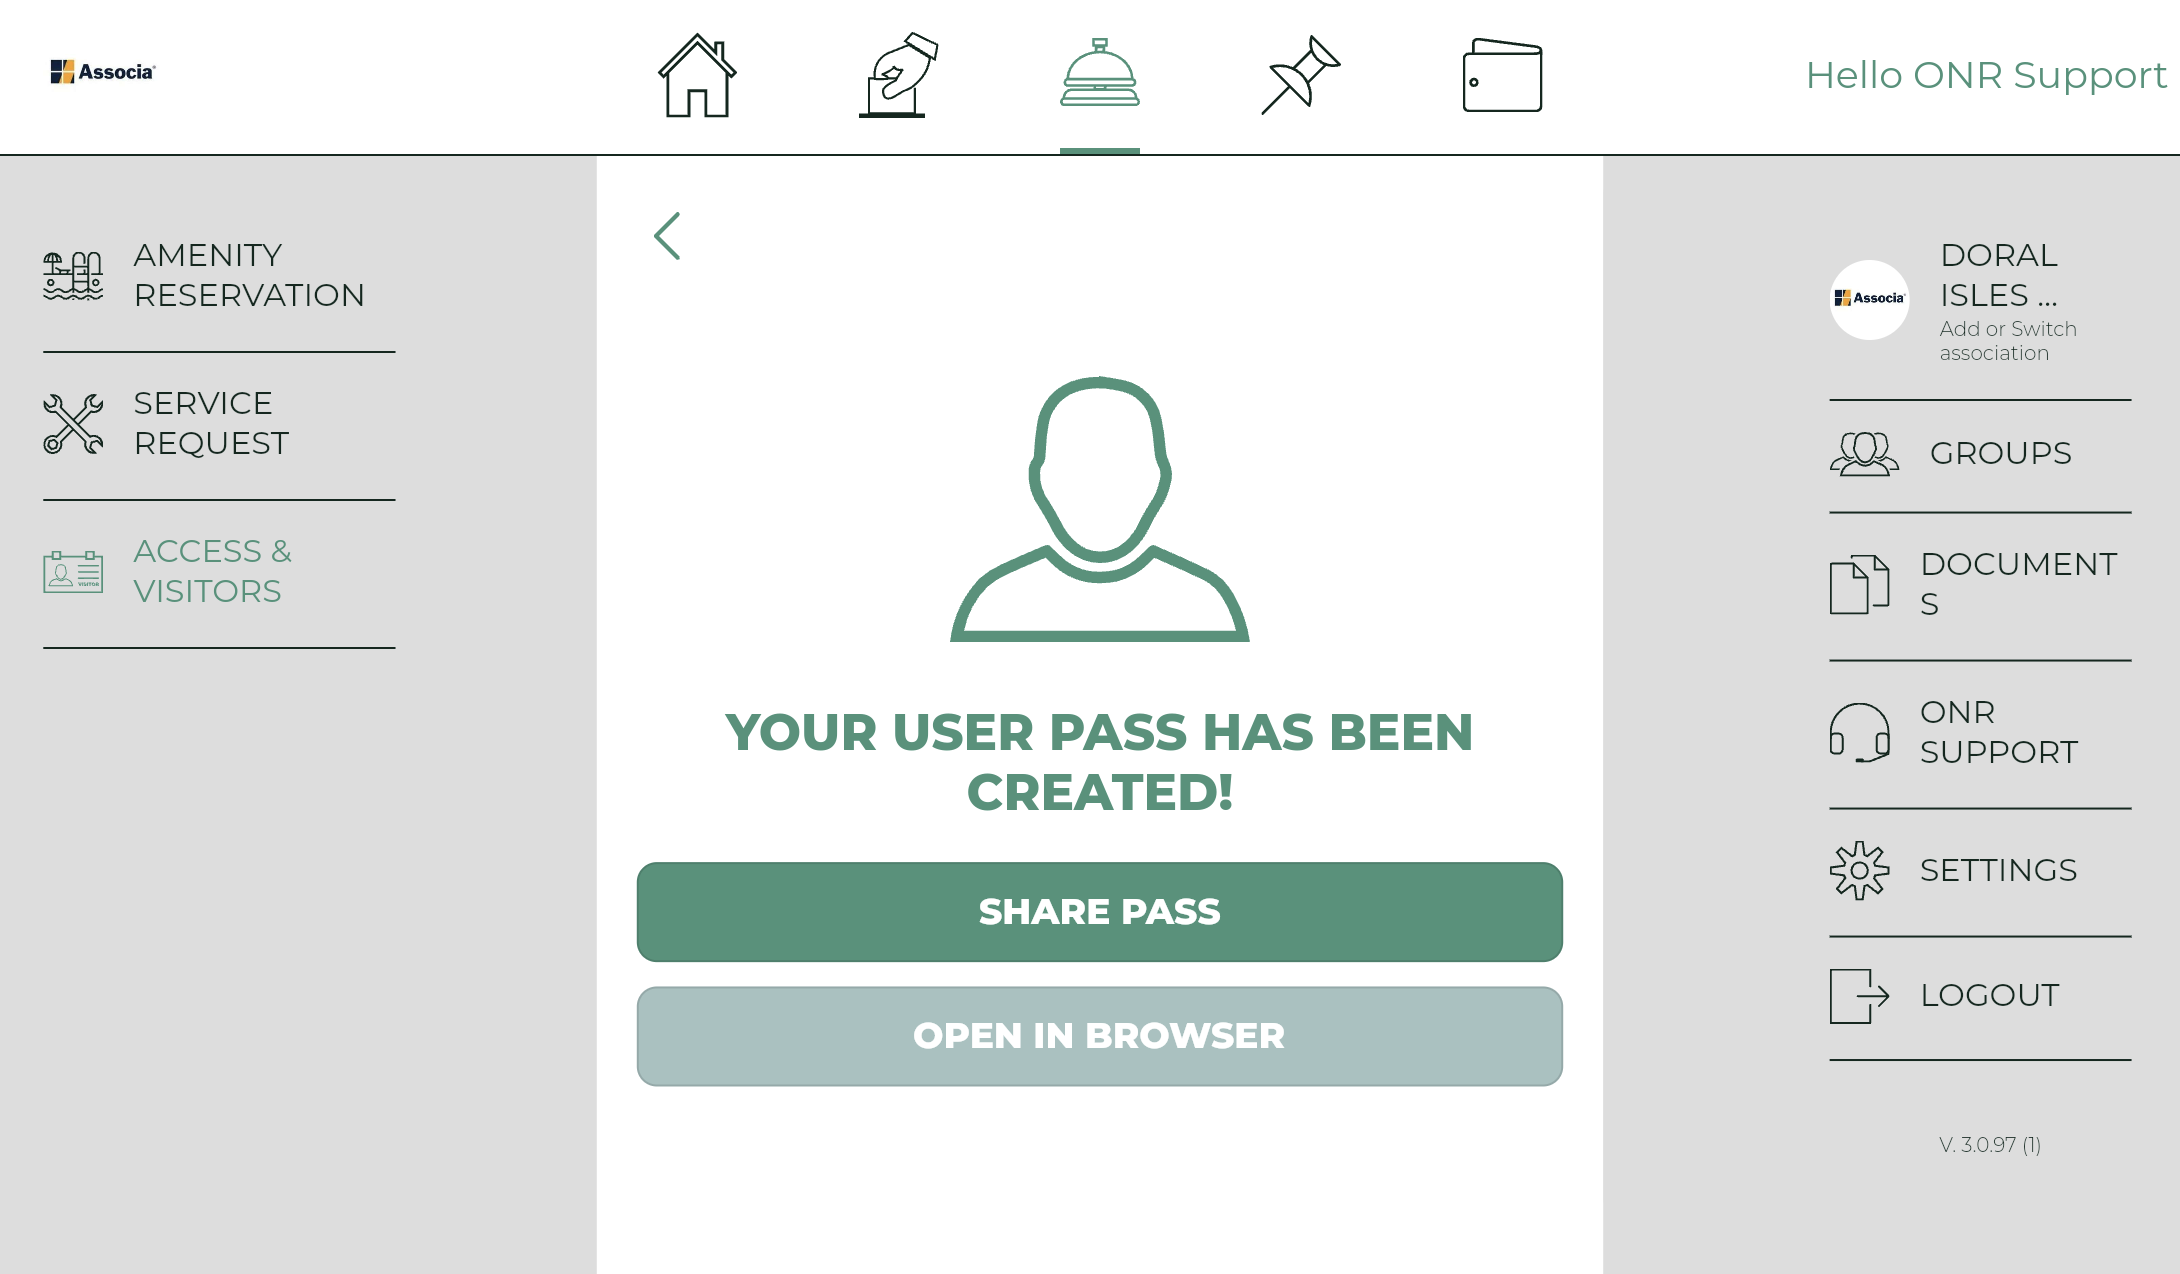
7. Pass Successfully Created Congratulations! You have successfully generated the visitor pass. You can now opt to either share the pass or open it in your phone’s web browser.
- To Share the Pass: Choose “SHARE PASS” to access sharing options tailored to your phone model.
- To Open in Browser: Select “OPEN IN BROWSER” to view the pass in your mobile web browser, allowing you to take a screenshot or share it as needed.

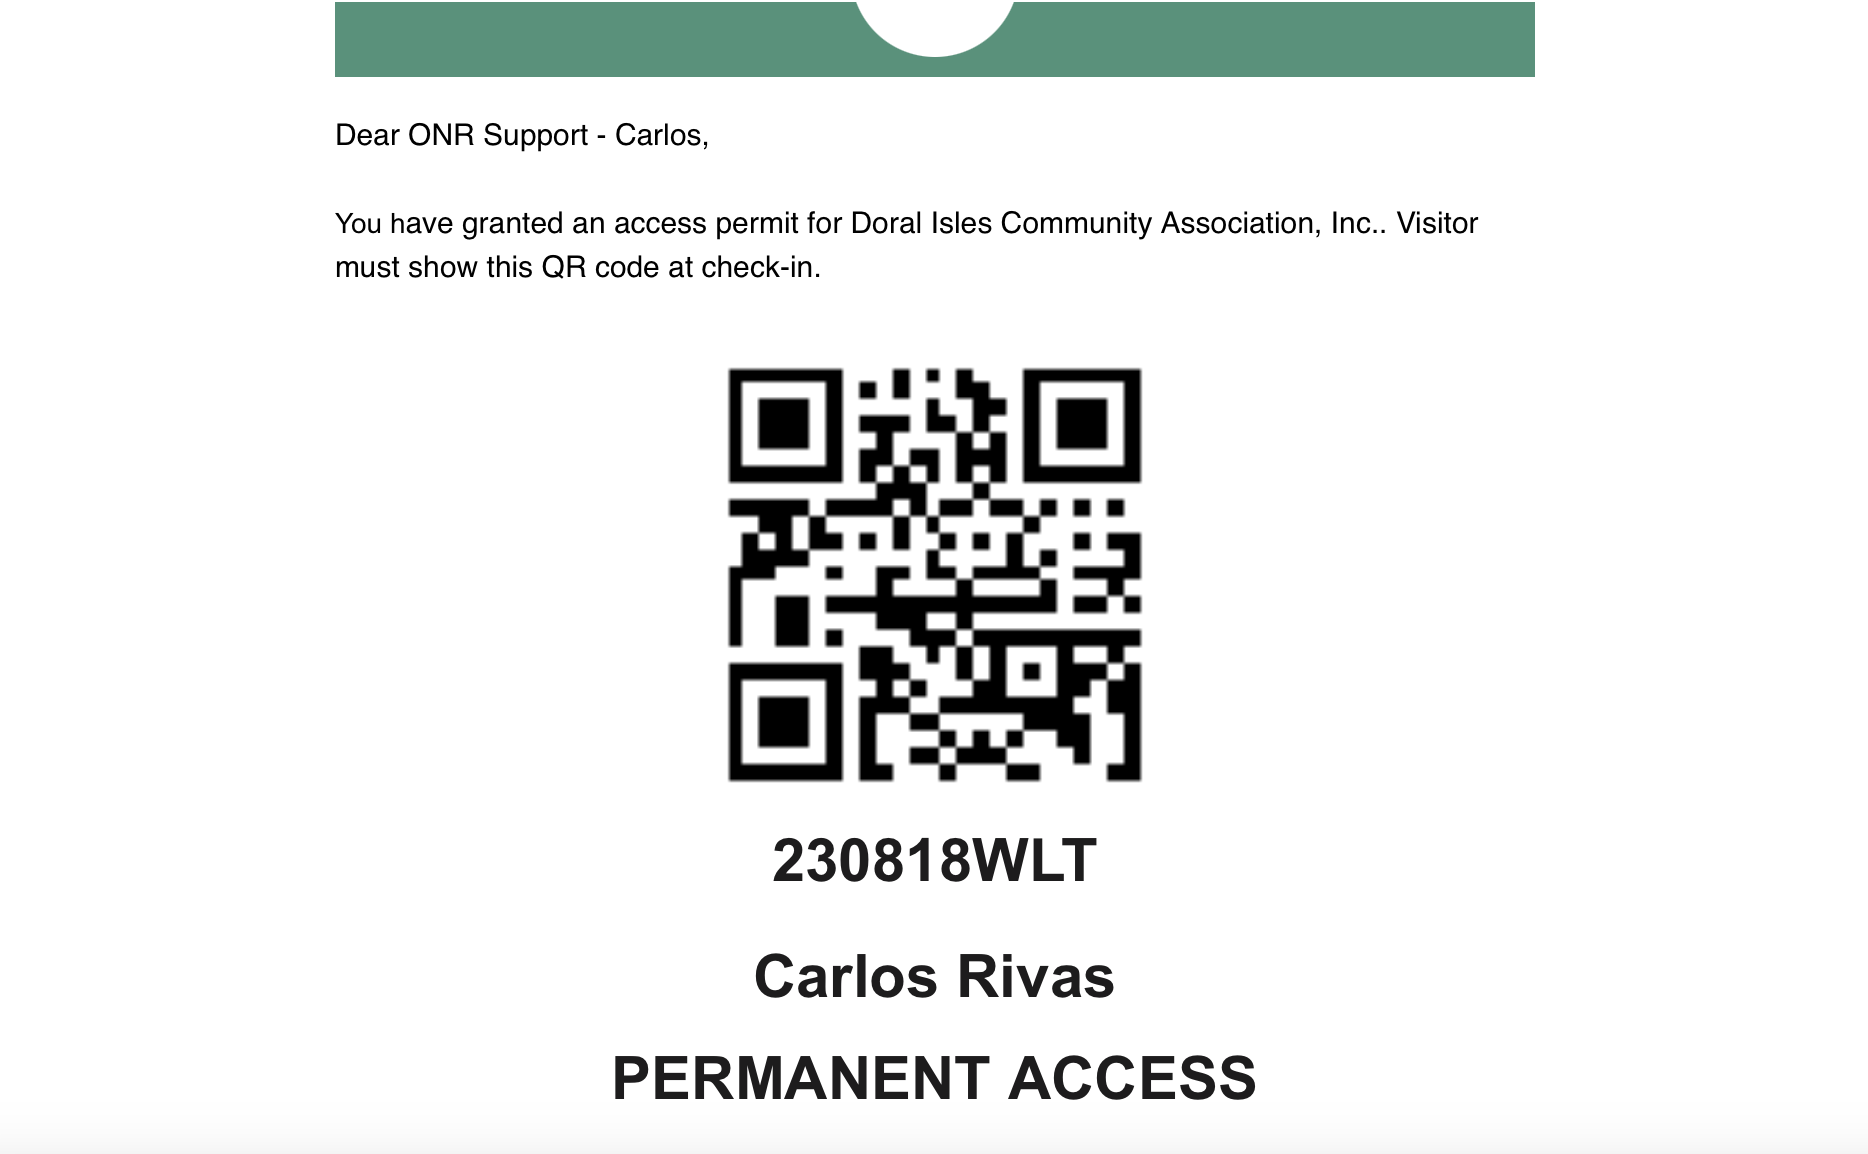
- Emailed Option: The pass can also be sent to your email, enabling you to forward it to your visitor for their use. (shown below with QR Code)

By following these straightforward steps, you can effortlessly create visitor passes using the Doral Isles App’s Access & Visitors feature.
NEED HELP?
If you have any problems or need additional assistance, don’t hesitate to reach out to our dedicated support team at support@onrapp.com.


